Showing posts with label m57. Show all posts

glittery purple zebras... they exist, right?

Posted by Unknown on Thursday, November 3, 2011

Hi everyone! Did you miss me?
Can you believe I didn't post for the last three whole days?!
Life catches up to you sometimes. I had a lot of school work and other things taking up my time.

But never fear... I always return.

To make my comeback, I'm posting some great nails I rocked a few weeks ago!


Purple, glitter, zebra... it doesn't get much better.
This idea came from a friend asking me to do her nails and do whatever I wanted. Somehow I landed on this, and then as soon as she left I did the same thing on my nails!


This look starts with 2 coats of China Glaze - Flying Dragon and one coat of Nails Inc - Bloomsbury Square.
I forgot to take a picture of this on my left hand so you get a messy right hand picture. Look at that great application... It's not usually that bad, promise.

Nails Inc is a bit pricey, but good news! Wet N Wild just released an exact dupe of this awesome purple glitter. It's called Back Alley Deals and it is in the Ice Baby collection. You'll only be able to find it at Walgreens. (Lucky me, my friend Sarah from Chalkboard Nails scooped up the ones I wanted and sent them to me! I got them today. Look out for swatches soon.)


Then I added the silver stamping with Sally Hansen Insta Dri - Silver Sweep and Konad plate m57.
And then... a coat of China Glaze - Fairy Dust.
Add some Seche Vite and you're good to go.


I just love the super sparkly purple base with the tiny rainbow of Fairy Dust. And animal print makes everything better, right?


I love this last photo! Click it to enlarge it and see how deep the polish looks. I just love it.

So, sorry for being gone, but I hope you liked my return! I sure did.
And I promise I have lots of awesome coming up. And I mean lots.
(Eye Candy? Ice Baby? Scent-scous? Beyond The Mistletoe? Back to Boho? Pride? Oh my!)
More aboutglittery purple zebras... they exist, right?

31 Day Challenge: Day 22

Posted by Unknown on Thursday, September 22, 2011

Good morning!

Today's theme is Inspired by a Song.
As you might remember, I have previously done nails inspired by Nicki Minaj's Super Bass video, so I knew I wanted to do another type of video-inspired nails for this challenge.

I landed on this one, my guilty pleasure song:


S&M - Rihanna.
This video is crazy. And probably should be PG-13. Or higher.
There are some interesting patterns and scenes in the video, and I chose to do skittles based on 5 of the patterns you see in the video!


They don't match at all but I love the way they look! Crazy and random, like the video.


Here's what I used:
Sally Hansen Insta-Dri - Whirlwind White
Wet N Wild - Black Creme
Nail Art Diva - Daffodil (yellow)
Wet N Wild - Tickled Pink (light pink)
Sally Hansen Insta-Dri - Presto Pink (darker pink)
H&M - Coral Summer (blue)
China Glaze - Recycle (gray)

The lace pattern is Konad m57 and 71 together.
The chains image comes from Bundle Monster BM12.
The zebra image comes from Bundle Monster BM16.

I took some screenshots from the video to show where the nails came from!


The zebra inspiration is easy to see!


So is the blue with X's.


Polka dots are always cute!


If you look closely you'll see that I tried to do the newspaper nail trick but it just didn't work very strongly so I added the chains image to those nails for a better look.

The lace nail doesn't come from one particular scene but there is lots of lace going on in the video!


What do you guys think? Do they suit the video?
:)
More about31 Day Challenge: Day 22

stripey POTC mani!

Posted by Unknown on Wednesday, June 8, 2011

Nail art for you todayyyy.

If you don't know what POTC means - it's Pirates of the Caribbean! This mani was done with three shades from the POTC collection from OPI.

This mani made me sad that I only bought the minis of these colors. :'(

Before I show it to you, I want to point out that I took this design from Bright Lights Big Color! She recently posted a bunch of nail art pictures and I saw this manicure and knew I had to do it.
Her colors were in a different order but I had to use Mermaids Tears first as that is my only full sized bottle so I didn't mind doing my entire nail with it :P


OPI - Mermaids Tears, Planks A Lot, and Sparrow Me The Drama.
I stamped from Konad m57 with Color Club - Worth The Risque. In Landa's photo the stamping wasn't too harsh and I didn't want mine to be either, which is why I went with the less opaque silver polish for stamping.


If you're familiar with these colors you know that they photograph a little too brightly - so here is a photo without flash that shows the true muted tones.


I liked this mani so much that I've had it on for like 5 days now. I even cut down my nails, and half of the pink is gone, but I'm still wearing it. Haha!

I didn't use tape between the lines - I am too impatient for that and I always end up doing the tape too soon and pull off the polish.
So this was freehanded, but it was with the mini polishes so the freehanding was probably a bit easier with the small brush. Here's what it looked like before the stamping:


A bit Easter-egg-like I guess, but I still love it.


Luvvvvv it.

I'm going to some beauty supply stores meant for professionals today, I wonder what I'll return home with?
More aboutstripey POTC mani!

orly - spark - swatch, review, nail art, and yellow comparison

Posted by Unknown on Thursday, May 26, 2011

Good morning! Yay for morning posts.
Today I'm going to post a swatch I've had sitting in my swatch folder for a while, so I'm just going to get it off my computer and into the blog world!
This is Orly's Spark, and I did some quick stamping art over it, and I did comparisons to other yellows.


I got this during Sally's Buy 2 Get 1 Free sale, and dare I say it, I like this yellow.


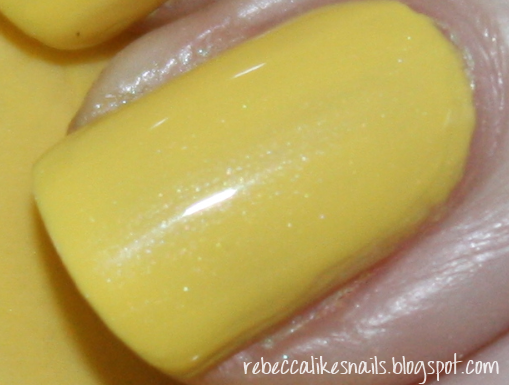
Spark at first seems like a slightly light yellow creme, but then in my pictures I noticed shimmer!
I couldn't see this in person. Maybe if I looked for it I could, but I had taken it off before I looked at the pictures.


I believe this would be another dupe for Chanel Mimosa, but I don't own it so I'm not totally sure.


It's pretty much exactly the color of bananas. So it is just a bit lighter than "normal yellow" I guess.


And there were apples on my table so I took a picture with an apple as well. :P
Here is Spark with all the other yellows I own. (This is a lot of yellow for a person who doesn't care for yellow.)


Joe Fresh - Butter, China Glaze - Lemon Fizz, Sally Hansen Xtreme Wear - Mellow Yellow, Orly - Spark, Color Club - Almost Famous.


None are identical, but the first 4 aren't different enough for a non-yellow-liker to own. My favorites are Spark and Lemon Fizz.
I haven't worn Almost Famous, and I'm not sure how I would feel about such a vibrant yellow.

The day I swatched Spark was also the day I swatched Electric Pineapple and Chartreuse Chase.


That picture kinda gives you a good idea of the green tones in the 2 yellow-green polishes.

And then I did some stamping!


I stamped with Insta-Dri Raspberry Race. I really liked this color combo, but I only wore this for a day. I couldn't handle yellow any longer. Haha.
One day I will get used to wearing yellow and orange, but that day has not come yet.

Last night I swatched like 6 polishes after midnight just because I was bored and didn't have to get up for work today, so who needs sleep! That is why I posted at like 2:30am. Haha.

I am really trying to get through my stash so my stash/swatch list can be complete. It's going to take forever but I am enjoying the process!

Have a lovely day. I'm off to maybe do a bit more swatching before I see Bridesmaids tonight :)

More aboutorly - spark - swatch, review, nail art, and yellow comparison

new gradient zebra + TUTORIAL!

Posted by Unknown on Saturday, May 7, 2011

Good afternoon guys! I have a very very exciting post for you today as you might already know from the title.
I finally got around to doing a tutorial for gradients! I managed to do it by myself (and my mom took one picture just for fun.)

Here is the masterpiece I will be showing you lovely people today!

(click to enlarge)
I decided to do a gradient I hadn't attempted yet, a summery yellow-orange-pink.
Keep reading to see step-by-step photos and read my tutorial!


I'm really happy to be showing you guys this today.


You'll need:
-Scrap paper
-Base coat and topcoat (I use Seche Retain and Seche Vite)
-Pink, orange, and yellow polish (I chose Sally Hansen Xtreme Wear Power Pink, Sun Kissed, and Mellow Yellow)
-A cosmetic sponge for the sponging
-Black stamping polish (I use Wet N Wild Black Creme)
-A konad or fauxnad full-nail image and your stamper and scraper (I used zebra from m57)
-Remover or acetone and a brush for clean up!

Here is a close up of the type of sponge I use.


You can find these at any drug store or Walmart and even some dollar stores.
When you use up a piece of it you can cut/rip it off and keep using it!

Start with your base coat and then paint your whole nail yellow.


This is 3 coats of Mellow Yellow and it is still streaky but don't worry - most of it gets covered so it is no problem.
(Please excuse my bandaid. I figured you would rather see the bandaid than the nasty cut I got today.)

This color is a bit brighter than bananas, I noticed this because I did this at the kitchen table.


Wait until it is dry, or mostly dry. It can be tacky but not wet.
Don't use a topcoat to speed drying, it will make it harder to blend.
Now the gradient starts! Get your sponge ready and drop a bit of orange polish onto your paper.


Now dip it lightly into the polish and begin sponging it onto the tip of your nail in little dabs.
You want to start at the tip and move towards the cuticle - that way the polish is thickest at the tip and thins out toward the cuticle, making the gradient more smooth.


The above photo shows how you should progress with the sponging.
Start out very faintly like on the pinky, and then keep adding. Always start at the tip and move down to make it blend well.

If at any point you get too much polish on your sponge, dab it off on your paper.

If you put too much polish on your nail, dab your sponge on the paper to get off the excess and then dab it on the spot where you have too much on the nail and keep dabbing to pick it up and move it around.

Here is the picture my mom took!


Yes my other hand is lilac. And the nails are short. I was going to cut both hands until I realized I should do this tutorial before cutting all my nails down again.

A tip - make sure to pay attention to the sides of your nails. It is easy to miss the sides:


Just add some more into the sides to make sure it is all covered.
Like so:


This is what you should have now:


Now, once you're satisfied with your second color, add the third!


Like I mentioned, you can cut off the part of the sponge you just used and begin again.


Pink!
Again, you start at the tip and move down. And you don't want to go too far down with the pink because it can overtake the orange.
If you mess up, you can also easily fix mistakes like this one:


Just keep dabbing an unused part of the sponge over the problem area and it will soften the mistake and blend it.

I felt that the pink did overtake the orange a little, so I decided to sponge some orange right in the middle of the nail again. It will still blend in well.


Much better!


By the time you do all your sponging, they should be dry enough to stamp on. So get to it!
Adding the stamp on top helps the gradient look blended, but you don't need to stamp on it if you don't want to or don't have plates. You can also freehand some black designs on top!
But like I said, you don't need to add anything if you don't want to - just make sure to use topcoat.


After you're all stamped, clean up!
When I stamp with black I like to use a Q-tip to clean the big black mess before using my brush for neater cleanup. It helps get the black off your skin without staining.
Then add topcoat. The topcoat will really help make the gradient look perfect and blended.


And there you have it!!

Also, it doesn't have to be on long nails like mine. I also did my short nails on my other hand.


Still just as cute! You just need to make each color section a bit smaller.

Another helpful trick I came up with - if you find that your polish is too thick/opaque to blend well, add some clear polish to it on your scrap paper. Mix it up, and you'll have a thinner polish that will blend much nicer!
It may take more sponging to build the gradient, but it will help you blend.

I hope this tutorial was good enough guys! Good luck with your gradients!
If you do one based off my tutorial I would love to see it, so post a link in the comments.
:)
More aboutnew gradient zebra + TUTORIAL!

girly leopard tips

Posted by Unknown on Tuesday, April 12, 2011

Hiiii to my new followers - I got 18 in the last 24 hours or so. Wow!

I'm not sure how I feel about the nails I'm about to show you.
I wore them 2 weeks ago or so, and this type of design just isn't my thing!


They're pretty, but I think I should have made the diagonal tip a bit less thick. 
But I had to cover up my stains! Haha.


I think it would have looked a lot better if perhaps I put the glitter on top of the edge of the blue instead of next to it. Wouldn't have been so big that way.

Here is what I used:


Sally Hansen Xtreme Wear - White On
L.A. Colors Art Deco - Silver Glitter
China Glaze - For Audrey

I freehanded diagonal tips across my nails with For Audrey, let that dry, and stamped from Konad m57 diagonally across the nail so I wouldn't have to do much cleanup. I added a line of the Silver Glitter to define the tip.
One coat of Seche Vite and it was finished!

I have yet to do a french tip design, normal or diagonal, that I really like. 
My nails are so long right now, I should try another!
Maybe I'll give it a go tonight if I manage to get enough studying done while I'm at work today!

I promise my posts will improve again once I'm done exams!
More aboutgirly leopard tips

yet another zebra mani!

Posted by Unknown on Sunday, April 10, 2011

I think I fall back on zebra stamps a bit too much, but I can't help it! I just love the look.
I originally wanted to do this design with the Bundle Monster zebra image because I think it is a bit more zebra-like, but my nails are too long for that image right now. Shocking!
This is the longest my nails have ever been.

(click to enlarge)
For this mani (that I did last night instead of studying...) I used Color Club Wild Orchid as a base color, and stamped with Sally Hansen Insta-Dri Brisk Blue, from Konad m57.


Wild Orchid is gorgeous. I hadn't tried it until last night.
It is from the Every Shade of Indulgence set from the Untamed Luxury collection.
I'm so happy I decided to use it on a whim last night, because it really is awesome. One of my new faves!
Here's a picture of it before the stamping.


It is similar in color to China Glaze's Recycle, but with really pretty shimmer!


Love!

Last night I decided to try wrapping my tips with polish as I know many people do and swear by.


But I hated it!! I couldn't stand the feeling of it for some reason. So I took it off my tips with a qtip! Haha.
I don't find it very noticeable if I don't wrap my tips so I don't think I'm going to try this again unless I think a polish or mani absolutely needs it.

For some reason, my nails don't look as long in the pictures as they seem in person.
I think I'm going to have to cut them down soon.


In other news, does anyone have a bottle of Maybelline Goody Plum Drop they want to swap me? I've fallen in love! Unfortunately I fell in love a year too late. Hahaha.
More aboutyet another zebra mani!