Showing posts with label rhinestones. Show all posts

Snow White Inspired

Posted by Unknown on Thursday, December 29, 2011

I got several requests for more designs like the Princess Jasmine Inspired french tips I did.
Suggested by You're Late For Tea, and 2 anonymous followers.
This is a simple look loosely inspired by Snow White. I did an entire Snow White and the 7 Dwarves here.
French tips inspired by the colors of her sleeves, and the accent nail inspired by her hair and red headband.

Accent nail:
Start with 1 coat of Wet N Wild Black Creme

I have a red stamping polish, but it wouldn't show up over the black. So I stamped my bow image from Konad m56 using white polish.

Then pretended it was a pattern and painted the white areas with red acrylic paint and a tiny paintbrush.

Finally added a red rhinestone.

For the other nails, start with a pink french base. 
2 coats of China Glaze Innocence.

French tips using Essie Coat Azure. (Freehand them, or use guides. Whatever suits your fancy)

Add 3 red rhinestones along the french tip.

What do you think?

More aboutSnow White Inspired

Baby Shower Nails - On Me!

Posted by Unknown on Saturday, November 19, 2011

These are the nails I'm wearing to the baby shower. I tried several different things and they all looked like crap, so I went with a simple color and some rhinestones.
China Glaze Sea Spray 2 coats
Random rhinestones...


I topcoated over the rhinestones after these pictures and they lost some of their faceted look. I'll try to remember to report back on how they hold up.
More aboutBaby Shower Nails - On Me!

Princess Jasmine Inspired

Posted by Unknown on Tuesday, November 15, 2011

This look is for Hannah! She is having a Disney themed party where she is going as Jasmine and requested some nail art ideas. I've done the "Aladdin" movie before as part of my exhibit project. I posted it here as Part 1 and Part 2. Check them out if you would like a tutorial for one of the characters.

This time, I wanted to go with something more loosely inspired and not an exact character. This look is definitely more wearable and classy! ;) I was inspired to use a look originally done by Robin Moses seen as the third picture here. (You can watch her video tutorial, I did virtually the same thing.) I just used a light teal instead to reflect Jasmine's typical outfit.

Started with China Glaze Innocence, but any sheer pink french manicure polish would work.

Freehanded some China Glaze For Audrey tips. Tape them off if it's easier for you. Don't worry about it being perfect because you will be outlining it later.

I freehanded the following steps using Color Club Scent-suous Gingerbread Man. If you have a gold nail art pen that would work great as well.


Then I added some teal rhinestones when I applied the topcoat.

I think these give off a "Jasmine" vibe. They would compliment, without overwhelming, a costume! What do you think?
More aboutPrincess Jasmine Inspired

Bling Nail Appliques

Posted by Unknown on Thursday, October 13, 2011

I got these during a recent trip to Sally's and they were price $2.49. I hadn't yet seen them reviewed on any blogs that I frequent, so I thought I'd give them a whirl. End result = pleasantly surprised!
These are similar in concept to the Sephora Nail Bling. Full nail art stickers with a textured effect.
There are 18 individual stickers in the packet. I'm one that usually has problems with fit. My thumbnails fall on the large side, but the biggest sticker in this pack was PERFECT for my thumbs! So I'm sure it will fit well for a wide range of consumers.
 You can almost see the bubble texture to these stickers. Each bump/rhinestone is just a tad smaller than bullion beads. I fell in love with the gradient arrangement on this set.

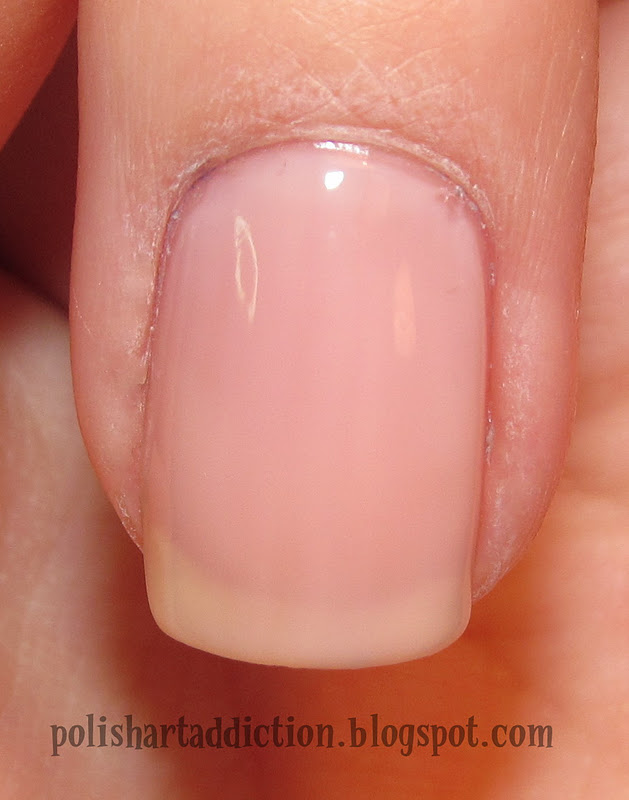
 I painted my nails with 3 coats of Orly's Pink Slip (this polish is quite sheer, but I just wanted a light flush of pink as my base). Make sure your base polish is completely dry before proceeding. 

Simply peel the sticker and place it along your cuticle.

Smooth it down along the sides of your nail.

I found it easiest to trim the free edge with scissors before "filing away the excess" as the instructions state. Cutting through the tiny rhinestones is not that difficult. They seem to be made of a silicone type material.

Then I filed the free edge with a downward motion to shore up the ends. I had trouble with wrinkles on my nails that have a stronger curve to them. You know how not all nails are straight from cuticle to free edge? Some of mine have a stronger downward curve than others. Because the sticker is slightly thick, it's not easy to get it to lie flat against a curved nail.

 Two down! These took me a while to apply, mainly because I was trying to be uber careful and get them just right.

In the end, I REALLY loved how they looked! They have a slightly bumpy texture to them when you run your fingers across them. The instructions state to apply topcoat to seal the edges and increase wear time, so I applied 2 coats of Seche Vite. The topcoat didn't take away from the texture at all, it just lessened it a bit.

I wore them for 2 days before removing them. The only troubles I had after that time were slight lifting at the same spots where I had wrinkles. 

For $2.49 I think they are well worth it when you don't want to spend 72 hours placing individual bullion beads in complex patterns on your nails. :) I will buy them again if another pattern catches my eye.
More aboutBling Nail Appliques

Blue V-French

Posted by Unknown on Friday, September 16, 2011

This is just something simple that I did the other day. It's actually my first real "success" when using scotch tape in my manicures. Usually I'm too impatient and pull up the base polish along with the tape. I was patient and took my time, and it worked!

Here's how I did it. 
2 coats of Essie Coat Azure (one of my favorite polishes of all time!)

Tape off the "V" shape and painted the tips with Hard Candy Sky, one thick coat. Removed tape.

Striper brush and Essence Deep Blue Sea to outline.

Add a clear rhinestone to the point.
 Bottle shots:

Hehe as I type this I realize what this reminds me of.... 
Betty's dress in my previous Flintstone nail art! Original post here.

More aboutBlue V-French

Simple French Stickers

Posted by Unknown on Sunday, August 28, 2011

I used these decals the other day to see if they would look like a french tip. They come in a pack with varying sizes. They are already lines up and joined into the semi circle you see. It's simple but nice. It could easily be recreated using the bundle monster falling stars image and some loose rhinestones.

Swatch of Essie Sand Tropez. Two coats. Not a perfect shade of nude for my skintone, but I still wear it.

You can see that the stickers didn't fit the shape of my nail exactly. My thumb nails are large and they weren't big enough. I wore it for a day before changing it.
More aboutSimple French Stickers

Ombre Skittles

Posted by Unknown

This was the product of experimenting. I wanted to test out how these colors worked together. Trying to find a good blend with different shades of the same color. Then I took it to another level, and another, and should have stopped. Lol. Which one do you like best?

Base polishes from thumb to pinky:
China Glaze Something Sweet
Orly Lollipop
Sally Hansen Insta Dri Blue-Away
China Glaze For Audrey
China Glaze Refresh Mint

Diagonal french of darker polish shade. From thumb to pinky:
China Glaze Secondhand Silk
Essence The One and Only
Sally Hansen Insta Dri Blue Blast
Sinful Colors Savage
Light green franken of mine

Even smaller diagonal french with the darkest shade. From thumb to pinky:
Cult Nails Devious Nature
Zoya Mira
Zoya Breezi
OPI Ski Teal We Drop
Essence In the Jungle

You could totally stop here and it would look great. Do an entire manicure skittled like this, or pick one of the color families to stick with for the whole manicure.


I took it one step further and added thin black outlines with my Kiss Nail Art Striper in black. I really like how this looked. I should have stopped here, that's my favorite.

I then took coordinating rhinestones to line the middle shade. I think it was just one step too far. It might have looked better if I had used smaller rhinestones?

So what do you think?

Which step would you have stopped at?

Which color gradient is your favorite?
I personally like the purple and the teal the best. :)
More aboutOmbre Skittles