Home » Posts filed under Funky French
Posted by
Unknown on Monday, June 11, 2012
Hello dear readers! I'm still very busy with school, only two more weeks to go! I've still got a lot of things to do, but right now I just want to show you these nails. :-) Yesterday I wore a brandless plain white creme. It took three coats to get opaque and it took forever to dry, but it was totally worth it. Who knew I could like white nails this much! But sadly the polish already chipped after one short day, so today I added these
lightning bolt tips with Essence Viva La Green. I hadn't done lightning bolt tips for a long time, I almost forgot how fun they are to make. ^^ Finally I added a bit of glam with OPI Spark The Triomphe. It's so sparkly!
♥
Posted by
Unknown on Saturday, April 14, 2012
Hi everyone! How are you? I'm liking semi-nude manis more and more and they can be very simple too! Just like today's mani with
zigzag French tips. Because there's no base color needed, you can immediately place tape strips on the nails. Apply a coat of
Essence Chuck on top, remove the tape right away and you're done. Finally a layer of topcoat and edgy nails are born! :-) What's your thought on this funky French mani?
Posted by
Unknown on Tuesday, February 14, 2012
Happy Valentines Day everyone!!! Okay, since my V-day outfit consist of a black dress with red lips all over it, lol, I wanted a black mani, that was a tad edgy and girlie at the same time, but nothing too crazy since my dress was full of valentine fun. It's a dress that my mom found and thought was so cute, and decided to purchase for me since it was only $10. At first I was a little nervous about it, but I actually LOVE it, and feel very festive today :) Thanks Mom!!
Okay, I started with a base of Professional 10, Pinky Promise and then using my black Konad polish and my Bundle Monster plate BM-209, I began with this.
I then added black tips with Scotch tape using Sinful's Black on Black
Finally I added a tiny cute pink bow on my ring fingers. I attached it with a small amount of nail glue, so they stay longer. I can tell you that it lasted through a shower & sleeping :)

Now for my Uh-Oh :( See my ring finger????? Well while doing my tips the first time, a piece of tape attacked my nail, and smeared the black. It was so late at night, that I was just going to leave it, and consulted Jack on it as well. He even told me to let it be, that it was no big deal. So for about 5 minutes I agreed, then went at the removal, and did it all again, lol. There was no way I could show you guys an imperfect mani :(
Also a pic of my OOTD wearing my dress:) (please ignore my not so cute office background)
Posted by
Unknown on Friday, February 10, 2012
A couple of nights ago, I had decided that I wanted a simple delicate mani with a little sparkle. Well, that's how it began, and then I became bored so my simple mani turned into the complete opposite!
I started with 2 coats of Savina Purple Hologram polish. I love this one, it's semi sheer, with just the right amount of speckled glitter, but could I just stop there, nope. Although it's called purple, it def pulls more pink on me, which is okay by me.
I then decided some polka dots were needed. So I used China Glaze Millenium and my Bundle Monster plate, BM19. Excuse the shiny cuticles, I had just oiled up, and maybe a tad too much.
Oh but of course, it needed tips!! So I used OPI Alpine Snow Matte and tape :) Jack loved this mani!
Now, as promised, here is a pick of my almost reorganized stash. Jack counted last night, there are 799 in the case, on top, and in front on the floor, which still need to be fit in somewhere. Oh, and even after this pic, the amount on the floor has increased, eeeek. Now I have about 400-450 sitting in a box, and I'm not sure what I'm going to do with those yet. At least my faves are displayed and easy to get to now.
and a bonus pic of Jack when we were first getting started on this 3 hour project. He really is the best for helping, and being so involved in my hobby :)
Posted by
Unknown on Tuesday, February 7, 2012
Morning!!!!! It's been a while since I've done a simple black tip funky french, and since it is one of my fave manis, I of course had to do one.
I started with 2 coats of China Glaze Diva Bride.


Then I used one of my fave nail art supplies, my bigRuby Nail Tattoos. I cannot tell you guys just how much I love these. They are soooo easy to use, and being so thin, they lay perfectly on the nail. I used 2 of the pink flowers from their Garden set, which BTW, is on sale right now. You can find it
here.Then using tape and Sinful's Black on Black, I did my tips :) and added a little rhinestone in the center of the flower.

On a side note, check out mine and Jack's masks for Mardi Gras!! I can't wait! Our friends are hosting the party, and it's going to be such a blast!
Posted by
Unknown on Wednesday, February 1, 2012
Posted by
Unknown on Tuesday, January 10, 2012
Hello dear readers :) This post I'd like to share this cloud mani with you. The red I've used is China Glaze Phat Santa, I bought it last Christmas in a set with Jolly Holly and Party Hearty, which I now happily own! (For some really strange reason I thought I didn't need Party Hearty when it came out in 2010, so weird, because it's so pretty!) I'd worn Phat Santa on its own for a day, but the next day I already had subtle tipwear on some nails, so that's when I applied the layered cloud look to cover up things. Another reason why I love this design ;-) The silver and black are China Glaze Millenium and Color Club Where's The Soiree? respectively, two of my most often used polishes.
I've received many requests for a tutorial for this cloud design, so you can expect it soon :) In the meantime you can read how I make the pattern in
this post. Thank you for reading!
Posted by
Unknown on Saturday, December 31, 2011
Hello everyone! Here's a quick little post on my New Year's Eve mani. Initially I wanted to do the festive
star pattern again that I wore for Christmas, but in the end I decided to go for something quick and simple instead. I don't like my nails naked, but this semi nude cloud look I like ^^ I used H&M Golden Treasure and Color Club Where's The Soiree? for the clouds and finished with a topcoat.
Have a great New Year's Eve and I'll see you in 2012! :)
Posted by
Unknown on Monday, October 24, 2011
 |
| Eeek! Tipwear already... |
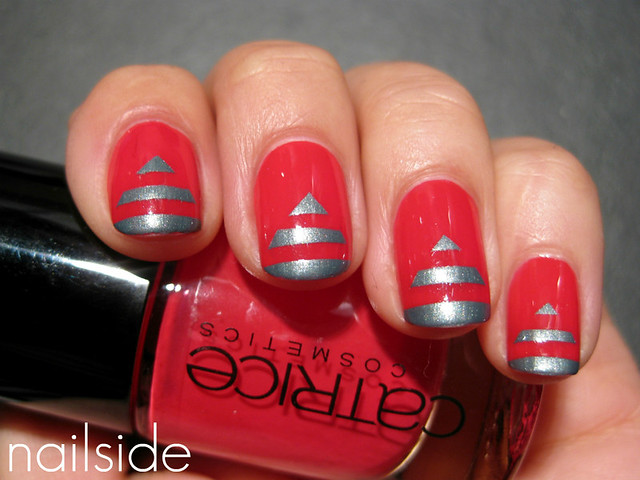
Hi everyone! These pyramid chevron tips were made with Catrice Raspberry Fields Forever and Essie Fair Game. Both polishes are amazing to work with. Raspberry Fields Forever is a bright folly red, which has a pink hue that's much better visible in real life. It has the great formula and easy application that I'm used to from most of Catrice's creme polishes, I only used two coats and a layer of Seche Vite, shiny! Because Fair Game has that hint of blue that makes the polish so special, I thought it would look nice next to the pinkish Catrice. I just love the combination of pinks and blues, no matter how subtle ;-) I've never worn Fair Game as a full mani and question if I ever will, because as much as I like it, I just think it works better as an accent next to other colors. At least, on my skintone that is, I bet it would look gorgeous on people with a nice tan!
Posted by
Unknown on Sunday, October 9, 2011
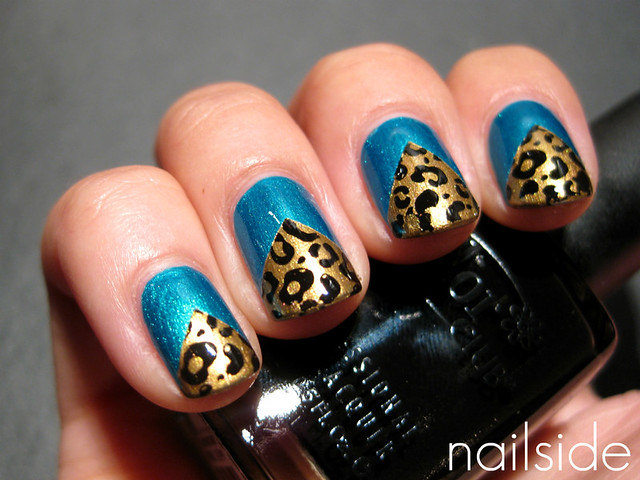
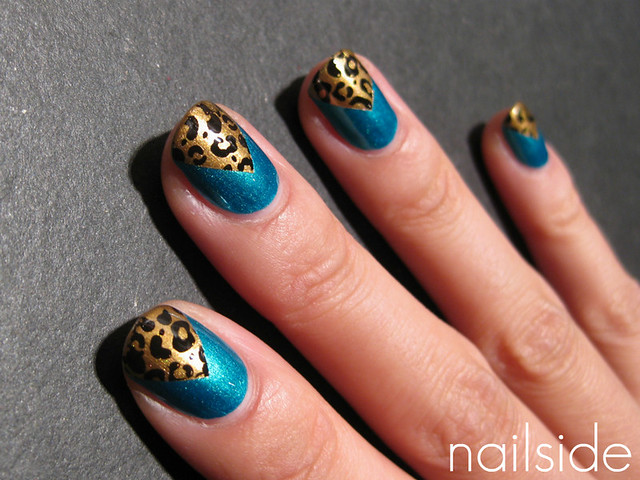
Wow! This look so isn't me, hahah. But once I had the idea I just had to make it reality. I used tape to make the chevrons, then I added H&M Golden Treasure for my gold background and finally I used konad plate M57 for the leopard print. Normally I suggest people to remove the tape right after applying the polish, to prevent the polish from sticking to the tape, but this time I ignored my own advise. But it turned out alright, as you can see :D I applied very thin coats and then after I stamped, carefully removed the tape strips, one by one. The pretty blue metallic/shimmer is Sephora's Summer In Bangkok, my favorite Sephora polish after
It's Time To Rock. It's actually more turquoise in real life, very pigmented and unfortunately also stains so bad! That's why I'm wearing two layers of base coat underneath... Anyway, would you wear this wild design? Or does it scare ya? ;)
Posted by
Unknown on Monday, October 3, 2011
 |
Left Orly Lucky Duck, right OPI Jade Is The New Black
(Completely on the left is Konad Solid Pop Green) |
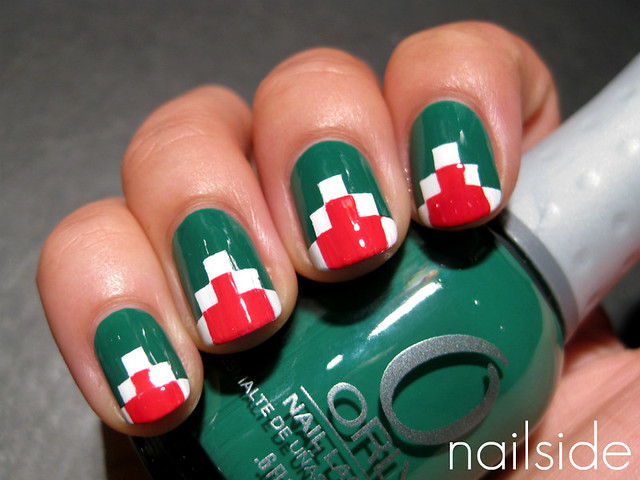
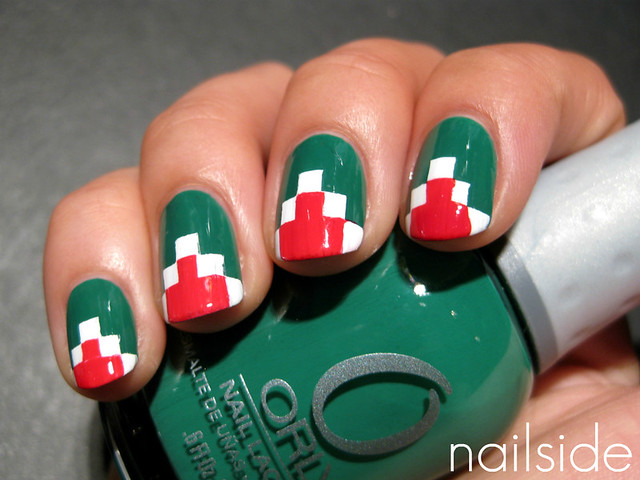
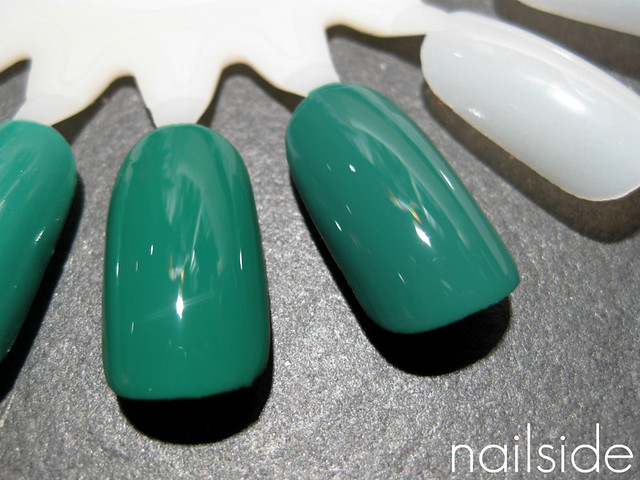
Hello everyone :) Last week I attempted my first aztec nails, or should I say pixel nails? The nice green you see is Orly Lucky Duck, it had an amazing formula, a bit in between a jelly and a creme, which made it very easy to apply. So you'll end up with a glossy and opaque finish after two coats. On the swatches of it online, it looked more turquoise, that's why I loved it so, but in real life it leans a lot more towards green. Still very pretty, though I don't think I needed it, since I now find it very similar to a polish I already had: OPI's Jade Is The New Black. They're not dupes, JITNB is a bit dustier than Lucky Duck as you can see, but still I think they're so similar, that you probably won't need both. They both have a great formula and cover in two coats, also the drying time of the two polishes is pretty good, so the big difference must be in the brush/cap (or price). I like both the rubberized cap of Orly and OPI's Pro Wide Brush, but you might not agree with me ;)
About the nail art, I used tape strips to make the aztec pattern, what else, right? ;) The white is Essence Stamp Me! White and the red is OPI's Big Apple Red. Yes, it took me forever to make, haha, but I'm quite patient when it comes to nail art, so I'd do it all again in a heartbeat. Though using it as an accent nail would be a nice compromise, like the polished perfectionist
AmyGrace did
here. Accent nail FTW, right! She's awesome. And that's it for this post, good night!