Home » Posts filed under Turquoise/Teal
Posted by
Unknown on Monday, June 11, 2012
Hello dear readers! I'm still very busy with school, only two more weeks to go! I've still got a lot of things to do, but right now I just want to show you these nails. :-) Yesterday I wore a brandless plain white creme. It took three coats to get opaque and it took forever to dry, but it was totally worth it. Who knew I could like white nails this much! But sadly the polish already chipped after one short day, so today I added these
lightning bolt tips with Essence Viva La Green. I hadn't done lightning bolt tips for a long time, I almost forgot how fun they are to make. ^^ Finally I added a bit of glam with OPI Spark The Triomphe. It's so sparkly!
♥
Posted by
Unknown on Sunday, May 27, 2012
Hello dear readers! Last week was a very busy week for me, but I did manage to prepare a glamorous guestpost for the lovely Danny from
Polish Chest. Please check out the full post
here!
Posted by
Unknown on Monday, April 16, 2012
 |
| A big thank you to the lovely boyfriend for taking this picture for me! :-) |
Skittles! Pretty much the easiest form of 'nail art'. This time I went for a bright and funky color scheme with four (once again) Essence polishes:
Let's Get Lost
Viva La Green
Lime Up!
Ultimate Pink
I just love these Colour&Go polishes! Their formula is just perfect most of the times, they cover in two coats and yes, they're small, but also very cheap (€1,29 for 5ml/0.16 fl.oz.) so you won't have to hesitate on buying a back-up of your favorite shade.
I didn't know pretty nails could affect my mood so much, but looking at today's mani just made my day over and over again, haha. I'm such a dork. :-P
Thanks for reading, guys!
Posted by
Unknown on Sunday, April 8, 2012
Happy Easter everyone! When I think of Easter nail art, I think of pastel shades and detailed designs. But after wearing soft colors so often lately, I wanted to have something brighter on my nails now! :) I started with H&M Wildflower as my basecolor, then I painted half of the nail turquoise with Essence Bella, using tape for crisp lines. Finally I added a few dots with Color Club Almost Famous and my funky Easter mani was done. :) Have a great day!
Posted by
Unknown on Thursday, January 26, 2012
Hi everyone :) This is how I wore the cloud design after finishing the
tutorial. I used Barry M Shocking Pink, China Glaze For Audrey and Essence Let's Get Lost and combined it with Essence Bella on the rest of my nails. I love how it turned out! It's so cheerful and kind of like the opposite of the more serious
grey cloud I did last week.
Also a big thank you for all the lovely comments that you guys left on the tutorial, you're the best! It makes me so happy to know it helped or inspired you. And I've really enjoyed all the awesome cloud manis that you shared with me so far, so keep them coming! See you next time. :)
Posted by
Unknown on Sunday, December 11, 2011
Hello everybody :) This is a layering mani I made with China Glaze Concrete Catwalk as my basecolor and a blend of blue and turquoise glitters on top. It was hard to capture how this looked in real life, it was quite pretty. All the hues kind of blended into one undefinable color, full of sparkles ^^ But under the direct light of the lamp which I took this mani under, it's not visible because of the bigger contrast between all the colors. It's still beautiful, but very different.
The bottom picture was taken in daylight the next day, it shows the blended effect a little better. (Excuse my tipwear :)) What do you guys think about this combination?
The glitters I used on top: a nameless blue and turquoise glitter from Claire's and Essence Edward
♥
Posted by
Unknown on Monday, November 28, 2011
Hello guys! First of all, I'd like to thank everyone who wished me a happy birthday in my
last post, it was very nice to hear, but I just celebrated my birthday last month, haha. The birthday nails were specially made for a reader who requested a birthday mani for her own special day ;-) So no birthday presents to share with you, but I do have these elegant chevrons in Art Deco style. The pictured bottle of polish, which I used as my base color, is M91 from a new cosmetics brand called Make-Up Studio. They carry a huge, colorful collection of eye-shadows, lipsticks, blushes, brushes, fake lashes etc. and... nail polish :) They just opened a brand new store in our local shopping mall, so last week I went for a look and M91 was one of the products I came home with. It's a dusty green creme which is close to Mint in Wikipedia's List Of Colors. The formula was pretty nice but the best thing is it covers in one coat ^^ I own quite a few dusty, grey-ish greens/mints, but none of those is similar to M91. So I'm happy to have yet another one in my stash! It's a shame though, that Make-Up Studio didn't give their polishes a real name, instead of just a number. They've got quite a few unique babies in their collection that truly deserve more identity. I admit they do cost a lot (
€12.90 for 12ml/0.41fl.oz.) but as I said, some are really unique and worth the money, if you want to spoil yourself :) Anyhow, the day after I added the first chevrons with tape, using China Glaze's Jitterbug. The little chevrons at the tips were made with China Glaze Ink. It's a striper polish with a perfect covering formula, the thin brush is perfect for making stripes but also for freehanding, like I did here. It came in really handy, because I felt way too lazy to wait for another coat of polish to dry, like I would've if I used tape again. Finally a layer of Essence Matt top coat and tada! Thanks for reading :)
Posted by
Unknown on Thursday, November 17, 2011
Hello dear readers :) The
mani from yesterday looked a lot cooler in the pictures than it did in real life, certainly when there's not a sign of the sun to reveal at least some of my effort haha. So for today's post I have the updated version which I made by filling in a few stripes with Essence Bella. Doesn't it make a cute couple with
Almost Famous? :) Thanks for stopping by guys!
Posted by
Unknown on Friday, November 11, 2011
Hello everyone! Since I didn't have much time to do my nails this week to post something, I decided to dig in the vault, look what I found! It's a
zigzag tape mani I did in the summer with China Glaze Recyle for the grey and
Orly's Viridian Vinyl and Purple Pleather for the tips, they were amazing to work with for the taping by the way. I expected the colors and zigzag pattern to pop more against the grey, but it became quite subtle actually. Still I like the matte and glossy finish combined in this mani :) What do you think about it? Thanks for reading!
Posted by
Unknown on Tuesday, November 8, 2011

Hi guys! For this post I have another request to show you. A little while ago I received an email from a reader who wanted me to come up with a funky mani for her informal dance soon. A few colors she liked were teal and coral, so I combined them in this "funky clouds" look. I like how simple this design is to achieve. Just pick three matching colors, one for you base color and two for the cloud shapes on top. The clouds are made by applying three strokes of polish next to each other, each smaller than the one before. My tip is to leave enough polish on the brush (but not too much!) so that when it touches the surface it will leave a nice, round dot as start point. This doesn't even need a lot of precision and you can just use the brush from your polish for this. And that's it :) Though I would advise using a fast drying top coat afterwards if you don't want to wait too long for your nails to dry, after all it's three coats of polish. (Four if you include base coat.) I like the way it looks here with plain cremes, but for a more festive look, a layer of (iridiscent) glitter can be added.
Below you can see the same look with China Glaze Midnight Kiss on the tips, which I made first. But after I took the pictures I noticed how Bella matched the rest of the polishes better so I just redid everything, for your viewing pleasure haha. Have a great night!
The polishes I used:
Essence - What Do U think? Version 1 (it looks less orange in real life)
China Glaze - For Audrey
Essence - Bella
Posted by
Unknown on Saturday, November 5, 2011
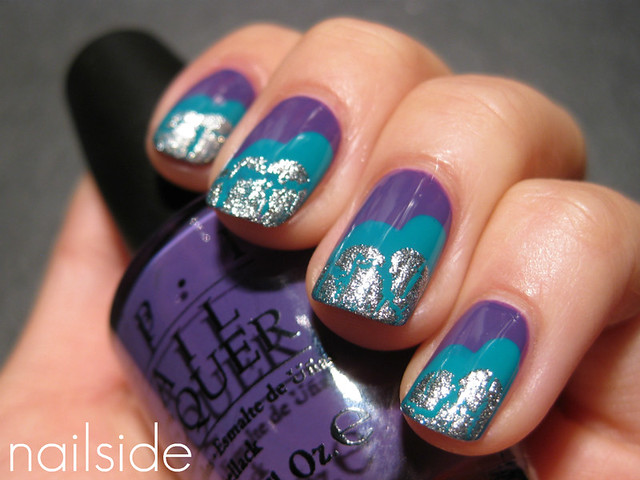
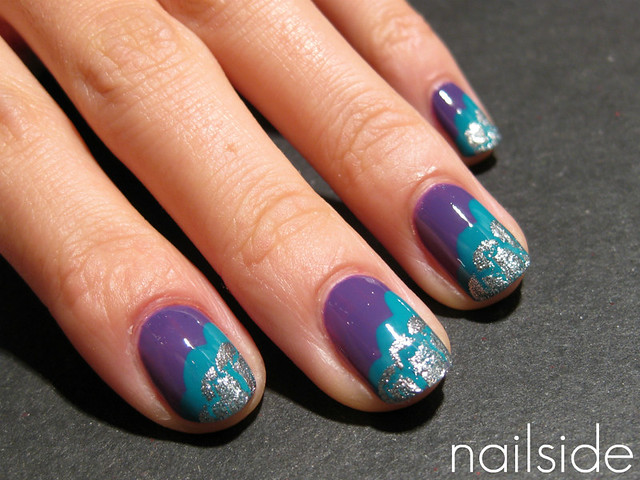
Hello everyone! I was in the mood for some funky nail art tonight but I didn't feel like spending too much time on it. And that's how I came up with these "funky clouds" you're looking at. I'm still no good at making up names for designs so don't make fun of me haha :P I started with two coats of
OPI Funky Dunkey and then I applied Essence Bella on top in three quick strokes that form the cloudy shape together. After it had dried I repeated the steps a bit closer to the tips with OPI Silver Shatter, a layer of top coat and there you have it! I think it turned out pretty cute ^^ And I can't wait to use it with other color schemes. Hope you guys like it too! Good night :)
Posted by
Unknown on Wednesday, October 19, 2011
Hello guys! Today's post is another custom mani, I abosolutely love doing these! I got this request from a player from the Greensboro NC
roller derby team The Mad Dollies. She asked if I could come up with some fierce nail art designs, in her team colors teal and yellow, that she could use for an upcoming game. She also loved the use of tape for nail art, so the first thing that came in mind was a fierce
lightning bolt tape mani! ;-) (Which all went great until my topcoat decided to smudge my hard work!) On my thumb and pinky I have the symbols that two certain players carry on their helmet. I made the star using tape and I really like the design, but it took a lot of precision to get all the tape strips right. So I'm still thinking of a more efficient way to make the design in the future. And the index and middle finger resemble the distinctive tights I saw players on pictures wearing, mostly striped or fishnet. And luckily I had Konadplate M57 to make the last :)
So Kristin, I really hope you like these designs! You can use all five of them or just pick the ones you like best ;-) And good luck with the rest of this season!
I really enjoy working on these custom nails requests I'm getting lately, so if you would like me to make some designs for a special event or just for fun, feel free to leave your idea in the comments or send me an email at: nailside@gmail.com.
Polishes I used in this post:
Essence Stamp Me! WhiteEssence - Let's Get Lost
Color Club - Almost Famous
Color Club - Where's The Soiree?
China Glaze - Ink
Posted by
Unknown on Wednesday, September 21, 2011


Hello everyone! How are you? I hope fine :) I'm alright, but something terrible did happen today! Somehow one nail of my left hand got teared a bit this week. I've been really good and didn't touch it for days but I guess the stress had taken over today, because I kept picking on it and now I've got a little nub there. Boohoo! So I made the rest of my nails shorter too to make it less noticeable. And so I won't be taken any pictures for a little while, because I don't like my nails this short :( But lucklily I still have a few manis from the vault for you. And today's post is one of them.
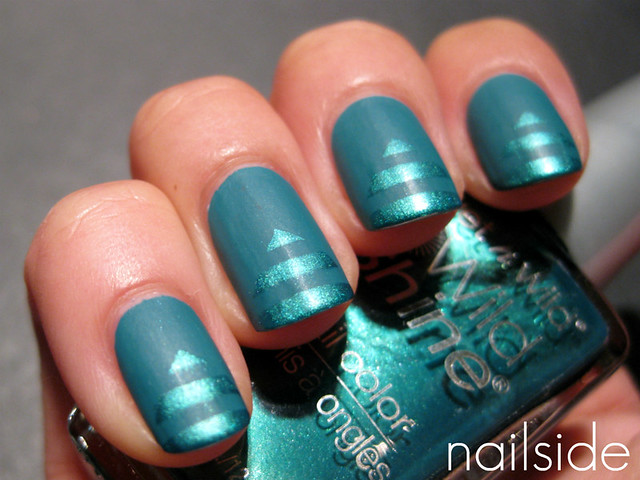
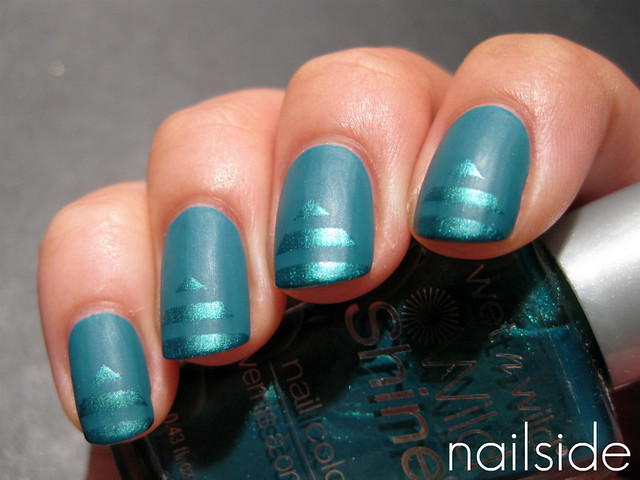
My basecolor is P2's Groovy. What a wonderful polish! I don't own many P2 polishes but my mom bought me
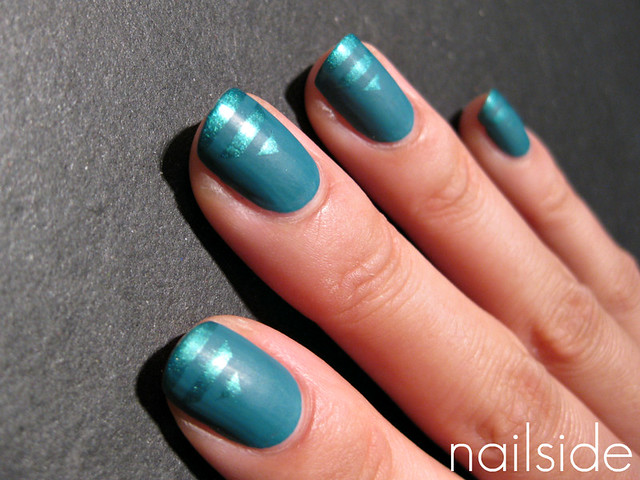
some bottles a few weeks ago. I really loved the elegant shape of the bottles and I love them even more now when I found out how perfect Groovy was. It's a muted shade of teal, with a perfect creme formula and you can get away with one coat of it. Lovely! The next day I decided to add the 'pyramid' design, like I used in the
'military chic' mani. I used Wet 'n Wild Carribean Frost for it, which gave a subtle ton-sure-ton effect, I really like that shimmery teal polish :) And as my finishing touch I mattified the look with the sadly discontinued Essence Matt topcoat. Maybe I'll give China Glaze's Matte Magic a try when I'm through my back-ups. Anyway, enough rambling for today! ;) Have a great night!
Posted by
Unknown on Monday, September 5, 2011
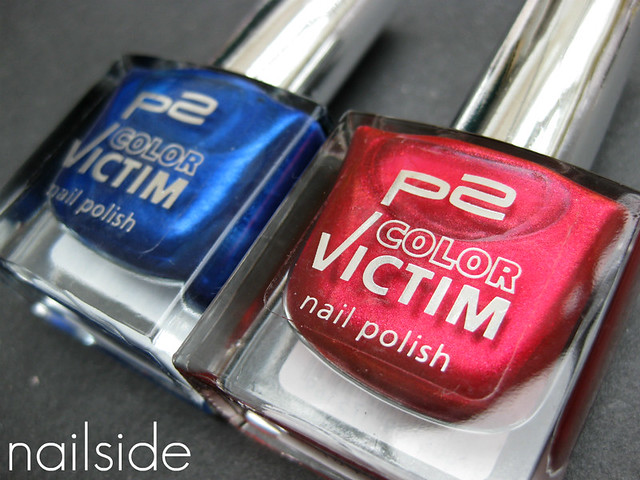
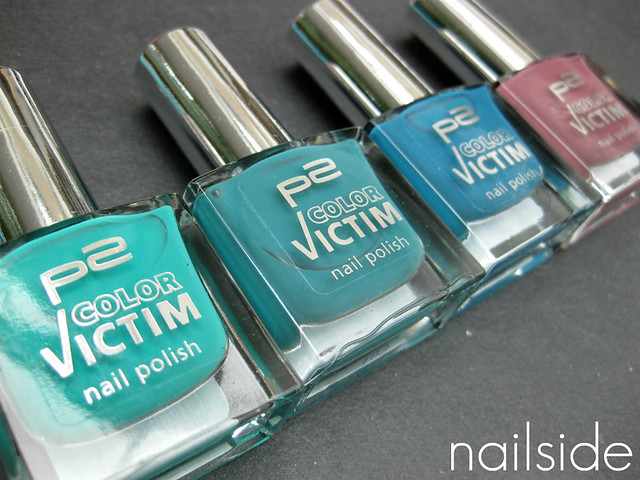
A little while ago, my mom went to Germany and got me these pretties ♥
She knows how much I love teals and turquoises, so she bought three of those.
Can't wait to try everything out. Thanks mommy!
Posted by
Unknown on Friday, August 26, 2011
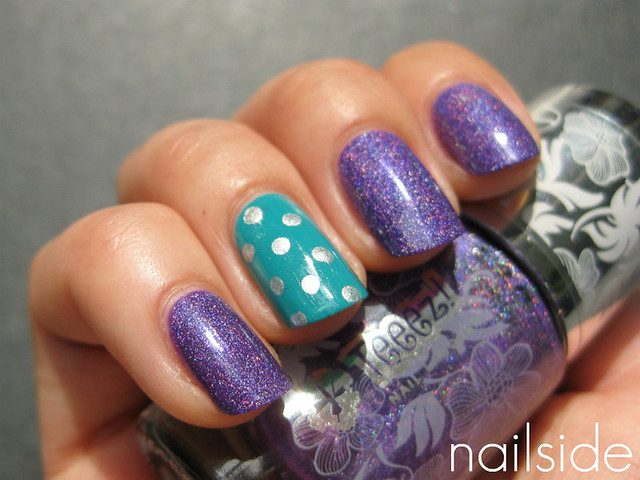
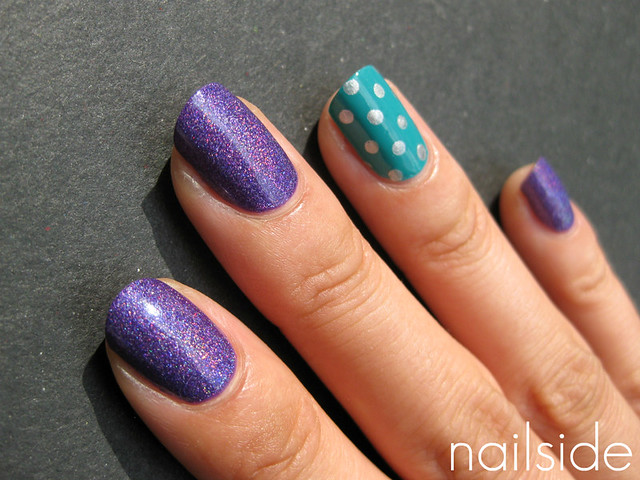
Hi guys :) This is a recent mani. I started with the accent nail, one coat of Essence Bella with silver dots. To match the accent nail I chose a purple creme for my other nails, W.I.C. Dakar (similar to
OPI Funky Dunkey). But after I applied the first coat, the sun suddenly began to appear, so not long after I was applying two coats of Teeez Outta Control on top. What a pretty purple that is! The holo isn't extremely strong, but definitely visible. Another lovely surprise was how shiny it was, I didn't even need topcoat. And it stayed just as pretty the day after, I couldn't stop staring at my nails! (Which can be quite dangerous while riding a bike... *Cough*) Thanks for reading!
Posted by
Unknown on Sunday, August 21, 2011
Hi everyone! Yesterday I showed you Sephora's
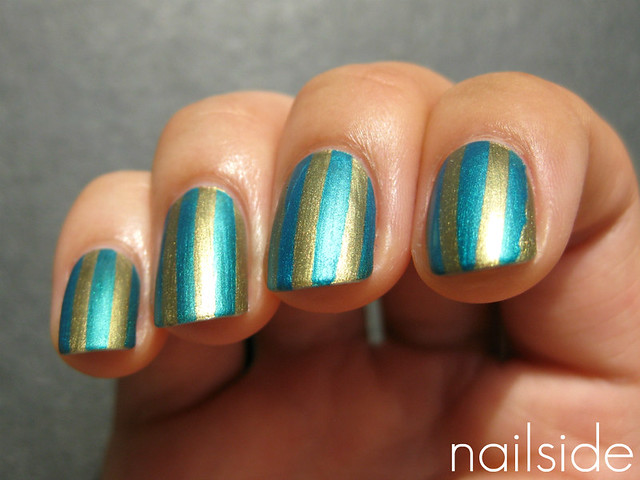
Diving In Malaysia. Though it was very special on its own, I already felt it needed to be spiced up :) So I used it for today's tape mani, just simple stripes in exotic colors. The pretty turquoise metallic is also a Sephora, called Summer In Bangkok. It's so extremely pigmented, but also stains your nails very bad, so it's a good thing I'm wearing several layers polish underneath. Because the glossy version looked a bit tacky to me, I mattified the look afterwards with Essence Matt topcoat. Hope you like it!
Posted by
Unknown on Thursday, August 18, 2011
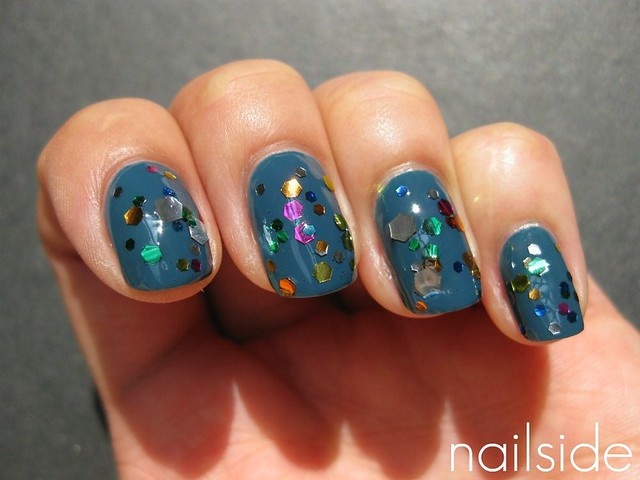
Hi guys, this post I have another Kleancolor layering experiment to share with you. The base color is
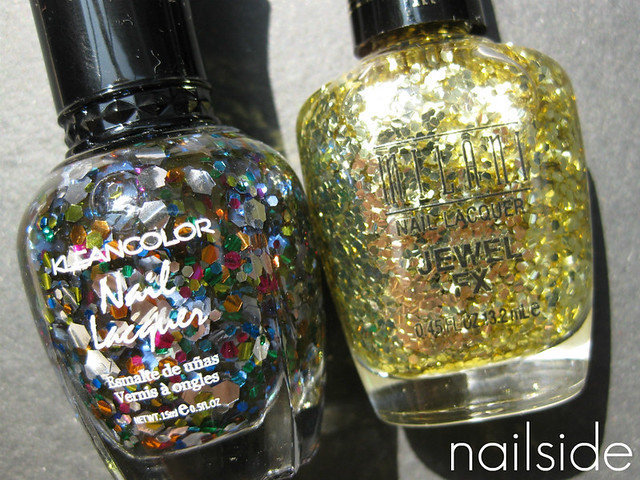
Orly Sapphire Silk, a beautiful muted teal with a great application. On top I used Kleancolor's Afternoon Picnic, a clear polish filled with HUGE different colored and sized glitter. I'm talking about chunky glitter on steroids here! Just to make a comparison, I included a picture of Afternoon Picnic next to a Milani Jewel FX polish, which already has large glitters.
As I said, Afternoon Picnic is a blend of multiple colors and sizes glitter. Once you've finally been able to fish out some of them, it does look pretty. But man, I wish more of that amazing stuff would stick to the brush. I think I've had to apply three, incredible thick layers on each nail to reach the density as seen on the pictures. So it most definitely needs fast drying topcoat, otherwise it will take you about four ages to get your nails dry. So not the best application nor drying time... But would you look at the result?! It's so festive! And people will notice the glitters from a mile away.
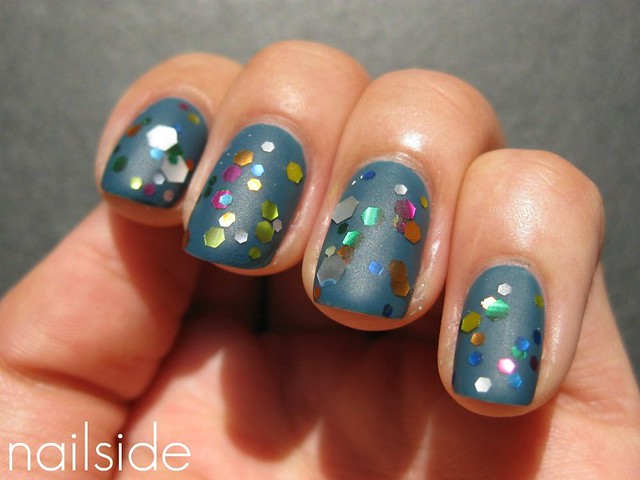
And last but not least, I also wanted to share the matt version of it with you :)
Thanks for reading!
Posted by
Unknown on Tuesday, August 2, 2011
Hi guys! Yesterday I showed you
China Glaze DV8, a beautiful holographic polish, which I've used to create today's 'circus' design. You may have seen this tape design before
here in an older post, I remember liking it a lot and that I wanted to use it more often, but I still had so many other ideas to try out that I never got to doing it again. So here it is, my second 'circus-tent-ceiling-mani', what a name, lol. It's not as neat as my first attempt, so I'll just keep my nails at a larger distance, which is much better for my eyes as well ;) Enjoy your day!
Posted by
Unknown on Monday, August 1, 2011
Hi guys, finally there was sun today! Holo time. This is China Glaze DV8, a beautiful teal/blue holo. DV8 isn't as holo as Gosh Holo, for example, but still really pretty to look at. The application was very nice, I applied two coats for full coverage, and what was even better was the drying time! In several minutes it's completely dry, so it's also a great polish to use for tape manis ;-) Good night!
Posted by
Unknown on Monday, July 25, 2011
Hi guys! For today's post I'd like to show you one of my latest finds, the amazing Viridian Vinyl by Orly. Viridian Vinyl from the 2010 Plastix collection is a gorgeous, muted teal creme that dries with a soft satin-matt finish. The formula was a great pleasure to work with and though the polish seems sheer after the first coat, it does cover completely after the second. Another plus is the short drying-time. Matt polishes are known for drying very quickly and this polish is no exception.
Teals, so yummy... I can never never get enough of colors like this. Though I already own quite a bunch of teals similar to Viridian Vinyl, this polish is a keeper for sure! The main difference with my other teals is its satin finish, but on top of that it has a wonderful application and of course the convenient, rubberized cap.
Another polish I bought from Orly's Plastix collection is
Purple Pleather, which applies just as well as Viridian Vinyl. I'm very happy with both these polishes and now even consider to buy the other two from the collection as well (Retro Red and Old School Orange), because so far the formula, finish and colors kick ass.
Thanks for reading!