Home » Posts filed under Accent nails
Posted by
Unknown on Saturday, May 12, 2012
Oooh, more tribal nails! I hope you don't mind. :-) I just love how detailed it looks with only little effort, especially if you use it for an accent nail only. Also it's a cute eyecatcher that way and a great excuse for being lazy, haha. The tribal print was freehanded with a white striper polish over black and the purple is OPI's Planks A Lot. Thanks for stopping by!
Posted by
Unknown on Thursday, May 10, 2012
Hi everyone! I hadn't done a freehand design in a while so today I made a detailed tribal pattern on a few accent nails. The basecolor is the lovely Westside Warrior from China Glaze and I used a gold striper polish (Janet #115) for the nail art. Though it looks pretty detailed it was really simple to make. I drew a few stripes on each nail and then I filled in the bigger stripes with dots or zigzags, that's it! I hope you like it. :)
Posted by
Unknown on Saturday, May 5, 2012
Hi everyone! :-) For today's short post I have this accent nail mani to show you. This afternoon I did a fresh mani with my favorite purple cream:
OPI Funkey Dunkey. A few hours later I wanted to add a little eyecatcher, so it became this silver
lightning bolt. It's a small addition, but just what I needed to complete this mani. ^^ Thanks for stopping by!
Posted by
Unknown on Friday, April 6, 2012
Hi everybody! For this post I have a broken heart for you. Nothing to worry about though, I just thought it would be a cool design as I'm still experimenting with sheer polishes. :) I used my vertical
lightning bolt design, then I painted the heart on top with a stencil I made from tape (like I used in this
mani). I'm not sure if I like the colors I used, but I'm glad the idea I had in mind came out pretty much the way I wanted, yay! Thanks for reading! :)
Polishes I used:
H&M - Bella's Choice
Essence - Stamp Me! White
Color Club - Warhol
Posted by
Unknown on Sunday, February 19, 2012
Hi everybody, for this post I have Miffy nails to show you. :) This mani was made for a dear friend of mine who collects Miffies. (I hope you liked it, sweetie!) The base color is OPI Suzi Says Feng Shui and for the little Miffy on my ringfinger I used acrylic paint. You might've noticed the pixeled picture in the left corner of a new tutorial, which is indeed for this design. :) So you can expect it very soon!
Posted by
Unknown on Sunday, January 29, 2012
Hi guys! How are you all doing? :) I've finally finished all my exams for the first semester, so more time for blogging again! :)
For this post I wanted to share this semi-nude mani with you that I made last year. I wanted to make hearts on my nails by making a template with tape and this heartshaped paper punch that I have, but the punch had a hard time getting through the tape, so all I was left with was a little wrinkled, misshapen hole... So I cut out the shape myself from a fold up piece of tape and that's how I got to this design with V-shaped French tip. I still have to get used to nude nails, but I kind of like it like this. ^^ For the rest of my nails I was looking for a smokey purple, the polish that came nearest to what I wanted was
Bourjois Bleu Asphalte. But I if I had
Frederiksberg from WIC Herôme at the time, I certainly would've gone for that instead, I love that color so much! :)
So what are your thoughts on these nude nails? Would you wear them yourself?
Posted by
Unknown on Thursday, January 26, 2012
Hi everyone :) This is how I wore the cloud design after finishing the
tutorial. I used Barry M Shocking Pink, China Glaze For Audrey and Essence Let's Get Lost and combined it with Essence Bella on the rest of my nails. I love how it turned out! It's so cheerful and kind of like the opposite of the more serious
grey cloud I did last week.
Also a big thank you for all the lovely comments that you guys left on the tutorial, you're the best! It makes me so happy to know it helped or inspired you. And I've really enjoyed all the awesome cloud manis that you shared with me so far, so keep them coming! See you next time. :)
Posted by
Unknown on Saturday, January 21, 2012
Hi everyone! For this post a grey cloud mani to match with today's weather.
On my accent nail I used China Glaze Recyle, a black creme and between those China Glaze Concrete Catwalk, which is what I'm wearing on the rest of my nails too. It's the best grey creme I've got. Just two smooth coats for an even, glossy finish.
♥I don't wear greys on their own very often, usually I just need some color to go with it. You know, to brighten things up. However, I think today's mani is cute in all its greyness :)
Do you wear greys a lot?
Posted by
Unknown on Wednesday, January 18, 2012
So many things to post and so little time! At the moment I'm in the middle of my exams, hence the lack of posting this week. But I've got plenty of fun stuff to share with you once things are slowing down. :)
Between all the studying I did manage to create a look for the
OPI Nails 4 Life contest on Facebook.
My entry had to be inspired by one of the four Nicki Minaj outfits provided by OPI. I chose the outfit she wore to Victoria's Secret and didn't have to think long about my choice, I was crazy about the fun graffiti style in vivid colors. Different techniques were used to achieve this look: sponging for the background, taping for the striped accent nail and a lot of freehanding for the stars, hearts and Nicki's initial, which took a lot of time to make but turned out pretty cute. ^^
If you like my entry, you can vote for me through
this page. The prize is the entire OPI Nicki Minaj collection, plus an autographed copy of her Pink Friday album! Isn't that awesome?! I'm thrilled about the whole prize, so I'd appreciate it if you truly want to vote for my entry, though that's entirely up to you of course!
Did you participate in OPI's Nails 4 Life contest?
Posted by
Unknown on Thursday, December 22, 2011
Hi guys! For this post I've made this chubby little snowman design by Rins from
Simply Rins. I saw it on her blog just a little while ago and fell madly in love... I couldn't stop looking at all ten of them on her nails, because they're just too cute! So many, many thanks to Rins for this adorable design! Seriously, don't you want to hug it? ^^ I used acrylic paint to draw the snowman and the base color is Essence Viva La Green. I love the color because it's not that typical mint green that we've come across many times in the past few years. It's a bit darker and quite vibrant, although it doesn't really show in the pictures (where I'm holding OPI Spark The Triomphe as decoration heehee). Rins also made a
tutorial for this design which you can find in the orignal post
here. Make sure to check it out, as well as the rest of her blog, she's created plenty of other amazing (freehand!) looks, very inspiring.
Thanks for reading and see you soon :)
Posted by
Unknown on Tuesday, December 20, 2011
Here's a little bonus post that shows the design from today's
tutorial "in action" :)
Posted by
Unknown on Saturday, December 17, 2011
Hello everyone :) For today I have the mani I made after finishing the
tutorial for the Christmas tree design with tape. The tutorial already received many comments, so thanks a lot for that! :) The beautiful red base color is P2's Fever. I love how elegant Fever is, the shimmer's just gorgeous and the finish is especially great for this month of the year. In the pictures you can see that the bottle has a golden glow, however that's not the case in real life, just a plain and perfect red shimmer! For a higher party-factor, I added a coat of Milani Gems. It looked fine with the glossy finish, but I mattified it anyway, so I could see all the different colors better ^^ Thanks for reading!
Posted by
Unknown on Thursday, December 15, 2011
Hi everybody, welcome to my second Holiday design tutorial! In this tutorial I'll be showing you how to make the classic Christmas tree shape, with the help of tape for perfectly crisp lines. The design isn't too difficult to achieve, but you do need to cut and place many tape strips, so you may want to use it for accent nails only if you'd like to save yourself a lot of work ;-) Let's give it a try, shall we?
 First apply your base color (with a basecoat underneath) and let it dry completely, if needed use a fastdrying topcoat to speed up the process.
With more detailed designs, I usually recommend using a plain base color to keep the focus on the design, but because that typical, zigzag shape of a Christmas tree is so simple and easy to recognize, we can go for something bolder this time. How about a (duo)chrome, a holographic polish or a sparkly glitter? Or perhaps just a simple but elegant shimmer?
When the base color is entirely dry, place the two rectangular tape strips on your nail, forming a chevron shape.
Then one by one, place two triangle shaped tape strips on each side of the chevron, with the points towards the center of the Christmas tree to be.
When you feel like all the tape strips are in the right position, press them down firmly so that they stay put on the surface. Then apply your layering color with a thin but opaque coat...
...and carefully peel off all the pieces of tape right away. And there it is, your classic Christmas tree design! Seal your design with a layer of (glitter) topcoat or add a rhinestone tree topper as a finishing touch. Merry Christmas!
Finally some useful tips:- For my tape manis, all I use is regular stationery tape. (For this particular tutorial I used painters tape for better visibility.) But you might prefer something else, so just experiment with different sorts of tape to figure out what works best for you.
- For your base color you can use any polish you like, however one-coaters will allow you to place the tape much sooner because those are usually fast drying. Of course you can also quicken the drying of polishes that require several coats to cover, by applying a fast drying topcoat. (I use Seche Vite).
- Your layering color(s) can be either a one- or two-coater. Because you've already applied a base color, most polishes that usually take two coats to cover now will do with one.
- Though I mention cutting the tape strips as step 2, I admit it is safer to cut before applying the base color. However, if you've learned how to cut the tape without having it touch your polished nails, it can save you a lot of time.
- You might want to leave the cut strips somewhere else than the edge of your desk/table, to prevent them from getting stuck to the surface while you're busy. You do not want to have to peel them off with your freshly painted claws!
- Apply your top color in one thin (but opaque) coat, this will create crisper lines.
- When you're removing the tape strips, try to remove them individually, if you can, because most of the time your design will come out neater this way
- Using tweezers to remove the tape strips can prevent your freshly painted nails from getting smudged.
- It's not always necessary to start all over if you've messed up your design, often a little touch-up with a nailart brush can solve the problem.
- If you want to use a matt topcoat, use a regular one underneath. My experience with matt topcoats is that they smudge the design very easily, even when it's completely dry. Applying a normal topcoat first will prevent that.
- Moisterize your cuticles afterwards, because the tape can really dry out your skin!
- You can practice this tutorial on your old mani that you applied a day (or more) before. That way it's certain that the base color is dry, plus this design is great for covering up tipwear!
- Have fun and practice makes perfect ;)
I would absolutely love to see your attempt on my design, so feel free to leave a link to your creation in the comment section!
Polishes I used in this post are P2 Fever and China Glaze Millenium.
Posted by
Unknown on Friday, December 9, 2011


Hi everyone :) For this post I have another Christmas mani. Since I haven't made any Halloween looks this fall, I'm planning on catching up some holiday manis with this year's Christmas ;-) Anyway, this week's been terribly busy, so I've been wearing Essie Your Hut Or Mine for the last three days. But today's weekend, yay! So I finally had time to update my mani. I added a Christmas tree for my accent nail, using tape. You know, if you think about it, a Christmas tree isn't that different from a
lightning bolt! I mainly used tape triangles which I placed underneath each other on each side of the tree to create the zigzag lines. For a little sparkle I added silver glitter on top and a larger piece of glitter as my tree topper. On the rest of my nails I made "
funky clouds", representing a snow scenery and later I added the "snow" with a dotting tool. In retrospect, I think the dots are a bit too much, so I doubt if I'm going to keep this mani longer than a day. But oh well, that means I can do my nails again tomorrow ^^ Thanks for reading!
Essie - Your Hut Or Mine
Essie - Lion Around
Orly - Pure Porcelain
H&M - Confetti Kisses
Posted by
Unknown on Saturday, November 26, 2011
Hello everyone! I hope you're all doing fine :-) I am, it's just a little hectic right now which is the reason of me posting so little lately. But I've got many new ideas to post once things slow down a bit, including tutorials and perhaps the start of my attempt on the 31 day challenge! I'm so looking forward to it! :)
For this post I'd like to share this birthday mani with you that I made for one of my dear readers. Since I am always occupied with other things that need to be arranged on my own birthdays, and usually just end up with a simple creme or glitter on my nails because of the lack of time, I decided to make something cute that's not too difficult or time-consuming to recreate. My accent nail, is (obviously) a birthday candle! I began with three coats of yellow (M67 by Make-Up Studio, a new brand!). Then I used a pink for the "cake". Once it had dried I added the candle, the little flame and wick, and there you have it :) On the rest of my nails I'm wearing China Glaze For Audrey. I painted the irregular stripes that I'm so into lately, with a white French manicure striper. What I love about those is how opaque most of them are, as opposed to regular white polishes. To complete the party look I added an iridiscent glitter (OPI Last Friday Night), it's sparkly and still reveals the stripe design underneath. And that's basically it! Happy Birthday! ^^

Posted by
Unknown on Thursday, October 27, 2011
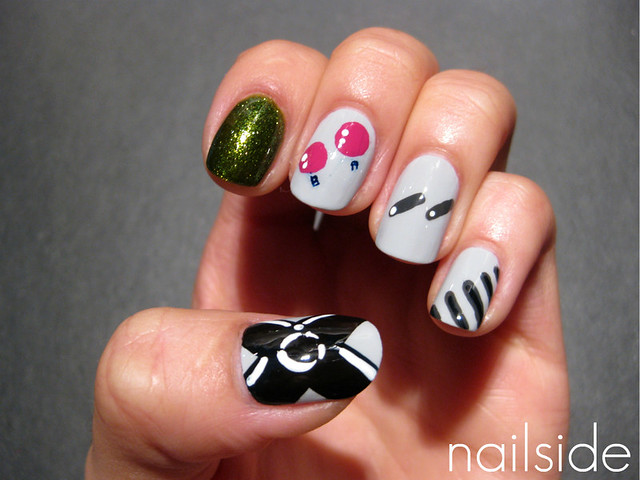
Hi guys, guess my nails! I'm not even sure if you can say that. And the title might've been a big hint haha... but they're gameboy nails :D I made these for a reader who is going to dress up as gameboy for halloween, how cool is that? I thought it was such a fun theme and was beyond excited to work on them. My base color was
Essence Got A Secret and I freehanded all the gameboy features with a tiny brush. For the glamorous index finger I used Orly It's Not Rocket Science, it's supposed to be the screen. The screen's kind of green, right? ;-) Anyway, hope you like them and goodnight everybody! :)
Other polishes I've used:
OPI - Dim Sum Plum
China Glaze - Concrete Catwalk
Posted by
Unknown on Friday, October 21, 2011
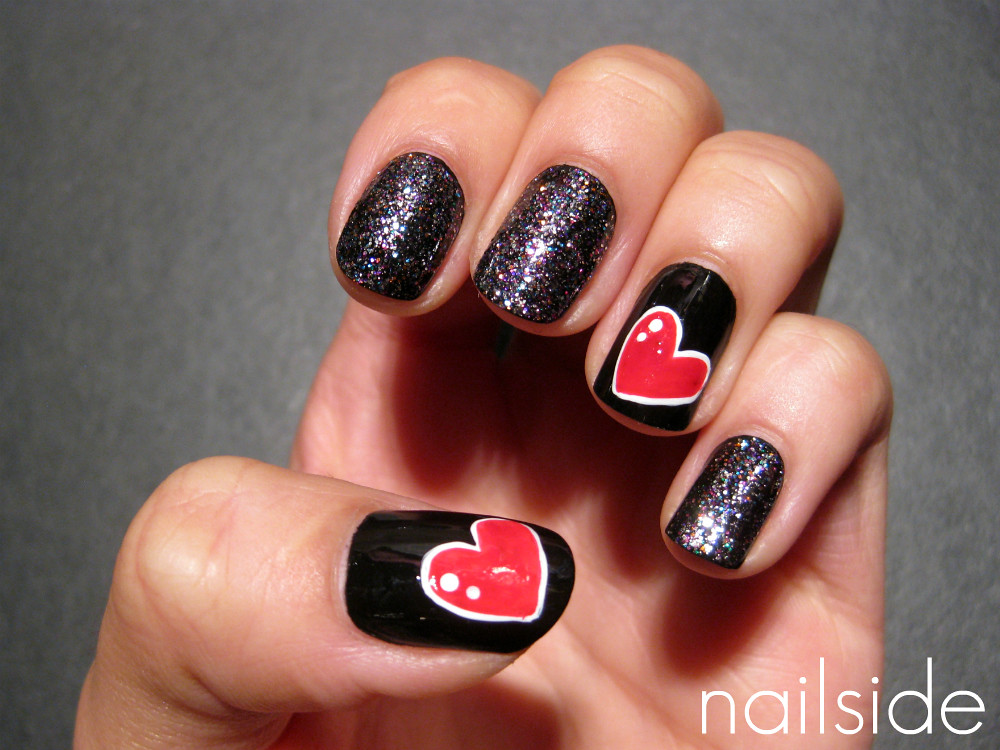
Hi guys! Because you've all been so great to me, I wanted to show you some love with this cartoon heart mani ^^ I've received so many sweet messages since the start of this blog and they mean so much to me. I'm not good with words, nails are more my thing ;-) so this one's for you!
The hearts are freehanded and you can find a tutorial of the design
here or at the tutorial tab above. On the rest of my nails I'm wearing one of the best glitters ever made: OPI's Mad As A Hatter. It has so many colors, love it! For a better view of the mad glitters, just enlarge the pictures by clicking on them.
Thanks for stopping by!
Posted by
Unknown on Wednesday, October 19, 2011
Hello guys! Today's post is another custom mani, I abosolutely love doing these! I got this request from a player from the Greensboro NC
roller derby team The Mad Dollies. She asked if I could come up with some fierce nail art designs, in her team colors teal and yellow, that she could use for an upcoming game. She also loved the use of tape for nail art, so the first thing that came in mind was a fierce
lightning bolt tape mani! ;-) (Which all went great until my topcoat decided to smudge my hard work!) On my thumb and pinky I have the symbols that two certain players carry on their helmet. I made the star using tape and I really like the design, but it took a lot of precision to get all the tape strips right. So I'm still thinking of a more efficient way to make the design in the future. And the index and middle finger resemble the distinctive tights I saw players on pictures wearing, mostly striped or fishnet. And luckily I had Konadplate M57 to make the last :)
So Kristin, I really hope you like these designs! You can use all five of them or just pick the ones you like best ;-) And good luck with the rest of this season!
I really enjoy working on these custom nails requests I'm getting lately, so if you would like me to make some designs for a special event or just for fun, feel free to leave your idea in the comments or send me an email at: nailside@gmail.com.
Polishes I used in this post:
Essence Stamp Me! WhiteEssence - Let's Get Lost
Color Club - Almost Famous
Color Club - Where's The Soiree?
China Glaze - Ink
Posted by
Unknown on Tuesday, October 18, 2011
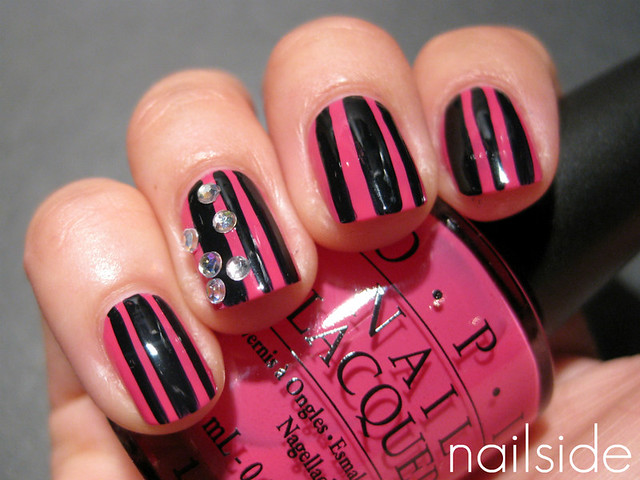
Hi everybody, today's post is something I made for a reader who'd requested a design for short nails. Two of her favorite colors were pink and black, so I made a simple stripe design with those colors. I love stripes, because they're never out of style in my opinion and also vertical stripes are a great way to make short nails seem a tad longer.
A stripe pattern with even-sized stripes is lovely, but it can be hard sometimes to make all the stripes exactly the same size. So I did a quick and easy-to-recreate pattern with random-sized stripes. The pink is OPI Don't Know Beets Me and for the stripes I used a China Glaze striper polish called Ink. (It's actually a very, very dark blue which looks pretty much black on the nails.) I just drew a few lines here and there, some bigger than others. And instead of actually drawing the stripes myself, I just let the whole length of the thin brush touch the surface while I pull it towards the tip, leaving pretty straight lines. So the brush does all the precise work for me ;-) Very easy and also nice with multiple colors, like I did
here a couple of weeks ago. Just use pigmented polish for the job so you won't have to go over the same spot over and over again.
At last I added a few rhinestones for fun. I hope you like this, Maja! :)
Posted by
Unknown on Friday, August 26, 2011
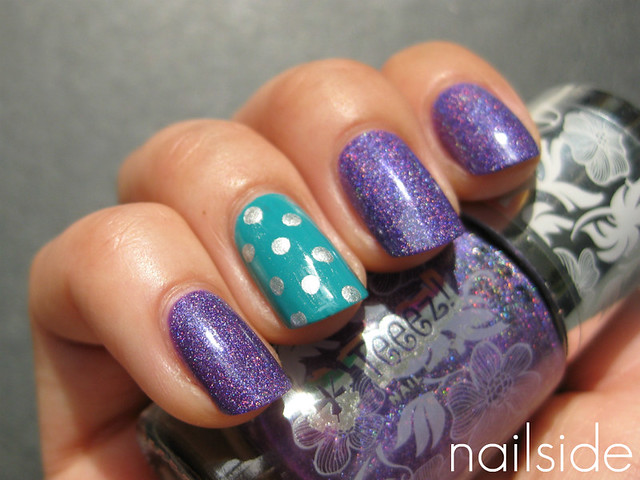
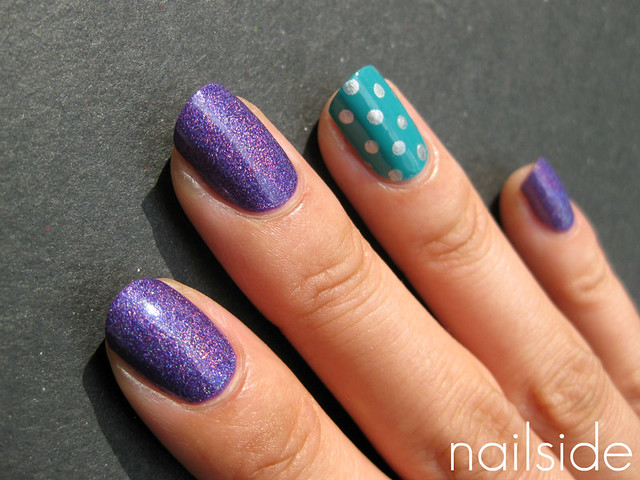
Hi guys :) This is a recent mani. I started with the accent nail, one coat of Essence Bella with silver dots. To match the accent nail I chose a purple creme for my other nails, W.I.C. Dakar (similar to
OPI Funky Dunkey). But after I applied the first coat, the sun suddenly began to appear, so not long after I was applying two coats of Teeez Outta Control on top. What a pretty purple that is! The holo isn't extremely strong, but definitely visible. Another lovely surprise was how shiny it was, I didn't even need topcoat. And it stayed just as pretty the day after, I couldn't stop staring at my nails! (Which can be quite dangerous while riding a bike... *Cough*) Thanks for reading!