Showing posts with label tutorial. Show all posts

Mermaid Nail Art

Posted by Unknown on Tuesday, May 1, 2012

I was inspired by Rebecca once again. It was this look here. I didnt' have the same colors, but I just wanted to go for a teal glittery look stamped with the grid image.

I started with Orly Halley's Comet. This is 2 coats.

Then I applied one coat of Sinful Colors Nail Junkie for some added circular glitter. It kind of reminded me of sunken treasure at this point.

Then I stamped using Bundle Monster BM 209 and China Glaze Adore

Enjoy!
More aboutMermaid Nail Art

31 Day Challenge - Day 22 - Inspired by a Song

Posted by Unknown on Monday, April 30, 2012

Inspired by the theme song to Sesame Street actually. Every kid knows these lyrics:
Sunny Day
Sweepin' the clouds away
On my way to where the air is sweet
Can you tell me how to get,
How to get to Sesame Street
Come and play
Everything's A-OK
Friendly neighbors there
That's where we meet
Can you tell me how to get
How to get to Sesame Street
It's a magic carpet ride
Every door will open wide
To Happy people like you--
Happy people like
What a beautiful
Sunny Day
Sweepin' the clouds away
On my way to where the air is sweet
Can you tell me how to get,
How to get to Sesame street...
How to get to Sesame Street
How to get to...
 Thumb is the Sesame Street logo.
Index - Oscar the Grouch
Middle - Cookie Monster
Ring - Big Bird
Pinky - Elmo

It's always tough for me to fit tiny letters and this was no exception! 


Step by step tutorial after the jump if you're interested.
I started with the following base polish colors. Sally Hansen Insta Dri Blue Away, Lightening, and Rapid Red. Then Sally Hansen Xtreme Wear Going Green in on my ring finger.
The I freehanded these other details using acrylic paints and the same polish of Blue Away and Rapid Red.
I kind of dabbed outside of my black outlines on the "fuzzy" characters so that they took on a look of fur.


2 coats of Seche Vite to smooth everything out!

More about31 Day Challenge - Day 22 - Inspired by a Song

Peculiar Polish Series - Moomin

Posted by Unknown on Thursday, April 19, 2012

It's another Thursday and time for more Peculiar Polish! Nev from Nevorpurify's Nail Art  is helping me out by designing looks that are from different cartoons that may be a bit less well known. If you have a suggestion for her, just fill out the embedded form at the bottom of the page!
Here's Nev->
Thumb: Moomins logo
Index: Little My
Middle: Moomin
Ring: Sniff
Pinky: Snork-Maiden
When an anonymous person requested these Moomins nails, I have to admit I wasn't very excited. I hadn't heard of the Moomins and, although they seemed cute, I didn't really get it. Well, since then the Moomins have invaded my life! Let me first tell you about the Moomins: they started out as a Swedish book and comic strip that centered around the Moomins (who are a family of trolls). Eventually the empire expanded and since their creation there have been movies, television shows, and even a theme park (!) devoted to the Moomins. Now I'll explain why the Moomins have become so exciting to me: Ron (my fiancee) doesn't usually get so excited about my nail art. Usually (unless I'm doing something Star Wars or Hellboy related) he could probably care less. But when I started researching the Moomins to figure out how I would do my nails, Ron suddenly became obsessed. I was watching a clip of the Moomins on YouTube which had the Moomins theme song. Well, ever since then Ron has been walking around singing a modified version of the theme song. Since he doesn't actually know the lyrics he just goes, "Moomins, Moomins, Moo Moo Moo, Moomins." (If you want to hear him sing it, check out the audio clip at the end of the post). It has been about two weeks and he hasn't stopped. It's endearing and annoying at the same time. Anyways, now that Ron is thoroughly obsessed he brought me home a Moomins related present -- Moomins biscuits! I haven't eaten them yet but they sure look delicious! Here is the requested tutorial: 

Start with a sky blue (I used a light blue Color Club) on your fingers and white (I used  Wet n' Wild's white) on your thumb.
Use black acrylic paint to silhouette the characters. On the thumb make a half circle for the sun and use small strokes to create black sun beams. 
Make each character the correct color while leaving a small black outline. Now is also a good time to add their necks (I don't do it earlier so that I make sure my outlines stay crisp). Also add in the black on Sniff's ears and touch up Snork-Maiden's hair. 
Begin filling in the details. Little My gets orange hair and a lot of facial details while the  others mostly just get eyes and eyebrows. 
Dot in the characters eyes and finish the thumb by adding the Moomins logo at the bottom.  After you finish your nails with some top coat, you're done!
Mmm... Moomins biscuits!


...and here is a clip of Ron singing his version of the Moomins Theme:

More aboutPeculiar Polish Series - Moomin

31 Day Challenge - Day 20 - Water Marble

Posted by Unknown on Monday, April 16, 2012

The Tazmanian Devil! I wanted the marble to represent the chaos tornado that was his method of travel.
This didn't turn out exactly like what I had in mind, but it's the best I could do considering that I'm not well acquainted with water marbling. It's just not my preferred method of nail art. I don't have a lot of practice, and it took me over an hour to just get 3 nails done! My design in the water kept looking like crap.
In the end I seem to have combined every nail art technique known to man in one manicure. 
Water marbling, polka dots, freehand, and rimming the edges.

Here's a GIF of how I painted Taz.
make an animated gif
This was my first attempt at this manicure. 
I wanted spiral designs, but it mostly ended up looking like Agate stones. I had finished this late into the night and didn't have time to paint Taz then. And I didn't like the gray patches. So I just removed it and attempted again another night.

This was the next opportunity I had to watermarble. I settled on just trying to get vertical stripes across the nails. The middle nail and thumb were the closest to what I had in mind.

I had seen someone that posted simple polka dots on top of their water marble to hide the bubbles or flaws. So I went with that. Lol. Again, it ended late into the night and had to go to work the next day, so I left it at this stage.

The next night, I freehanded Taz on the index because that was my least favorite marble design.

I had some minor tip wear, but a good deal of shrinkage around the cuticle from a coat of Seche Vite over a long since dry manicure. So to hide that I did some "rimming" or freehanding a border/frame around each nail. I just used a Kiss Nail Art Striper in black. Then another coat of Seche Vite.
I was undecided at first, but I think I like how it turned out!
More about31 Day Challenge - Day 20 - Water Marble

Novelty Nails - Fuzzy Sweater

Posted by Unknown on Wednesday, April 11, 2012

I've seen a lot of these strange 3d textured nail art ideas springing up on blogs lately. From granulated sugar for a rock candy look, to the "caviar" look inspired by Ciate's costly product. The idea of putting flocking powder on your nails has been done on several blogs already. The Polishaholic and Let Them Have Polish are the ones I have seen. So when I was in Michael's and saw the flocking powder required to make this look was on clearance for 99 cents, I picked it up!

At first I thought it would be entirely impractical because how could you even wash your hands? 
Can it get wet? I did some testing (I'll show you) and I actually liked this a lot more than I thought I would! And it's so soft, you want to sit there and just "pet" your nails and stroke them lightly.... lol


Here is how I did it in case you are interested:
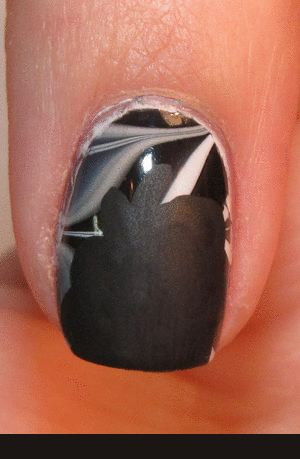
2 coats of China Glaze Laced Up. It's best to find a base color that's as close to the color of the flocking powder as possible. That way tiny gaps are less noticeable. Top with Seche Vite.

Once my nails were dry I applied a thin coat of Foil Glue. I got this glue with nail art foils from DollarNailArt.Com, you could just apply the flocking powder directly into your wet topcoat, but I found this held onto the fuzzies a little bit bettter.

Find some flocking powder, mine is Party Pink.

Best to do this part over a paper plate because it can get messy and that allows you to funnel the excess back into the container. Sprinkle some of the powder over your nail and lightly press it onto the nail so it sticks good. I then used a fan brush to brush off any excess.

Then you have this!

I wanted to test that water theory.....
When it gets in contact with water and/or soap it looks like this....

Did it ruin it? 
Once you lightly pat it dry to absorb the excess moisture, it looks just like it did before!
I wouldn't recommend much scrubbing, because that will likely loosen your powder. 
I wore this on an accent nail for a night out to test durability, and it faired better than I expected! I was out for 6 hours or so and I only had some flocking missing from the tips. The rest was still there, but it had thinned out a bit. So not bad! 

I know this look isn't from everyone, but it was a lot of fun for one night!
More aboutNovelty Nails - Fuzzy Sweater

Galaxy Tutorial

Posted by Unknown on Tuesday, April 10, 2012

Here is how I created the background to the Marvin the Martian nails. I largely followed CutePolish from YouTube's tutorial here.


Start with black nail polish. This is Sinful Colors Black on Black.

Lightly sponge on some white in random shapes & directions. Sinful Colors Snow Me White

Sponge some yellow to the centers. Barielle Lemondrops.

Sponge on some pink around the edges. China Glaze Dance Baby mixed with a little bit of Orly Terra Mauve.

Sponge some dark blue polish around the edges to fade it into the black. Barielle Berry Blue.

Add some tiny white dots of polish either with a toothpick or paintbrush.

Add a coat of tiny glitter polish. China Glaze Fairy Dust. Seal with topcoat!

More aboutGalaxy Tutorial

31 Day Challenge - Day 18 - Half Moons

Posted by Unknown on Monday, April 2, 2012

I guess that's why they call this a challenge? It took me a long time to find something that would fit a cartoon and half moons, so here we go.
Sailor Moon nail art highlighting the half moon. I attempted to paint the cat "Luna" from the series on my thumb, but it was a disaster. So you're just getting the collar and red tie that was so prominent on her outfit. I broke it down, so hopefully you can recreate it! It might be hard to get each part on all of your nails similar, so feel free to just use it as an accent nail if that helps. I also created this look entirely with nail polish. I didn't use any acrylic paints.


I used the following nail polishes:
Sally Hansen Cafe Au Lait
Barielle Berry Blue
OPI Alpine Snow
Sally Hansen Insta Dri Rapid Red
Kiss Nail Art Black Striper Polish
Barielle Lemondrops
-topped with Seche Vite topcoat!

gif maker

I hope you enjoyed these!
If you're a fan of Sailor Moon you can also check out these designs I did on some false nails a while back. One is virtually identical to this. ;)
More about31 Day Challenge - Day 18 - Half Moons